How to compare AWS Bedrock prompts
Sep 12, 2024

Evaluating LLM prompts is important for determining whether they are improving your app. In this tutorial, we explore three methods to assess prompts by comparing their LLM outputs. Namely:
To show you how, we set up a basic Next.js app, implement the AWS Bedrock API, and capture events using PostHog.
While this tutorial focuses on Next.js and Node, PostHog supports many different SDKs and frameworks. The concepts in this tutorial apply to all our supported SDKs and frameworks.
Download the sample app
We've created a sample app for this tutorial. You can download it from Github.
To set your app up, first ensure Node is install. Then run npm install to install all dependencies.
You must also ensure that you have properly configured your AWS credentials and region to use the AWS SDK for JavaScript. You can do this by calling aws configure using the AWS CLI.
Once done, update the BedrockRuntimeClient initializer in src/app/api/generate-llm-output/route.js to use your preferred AWS region:
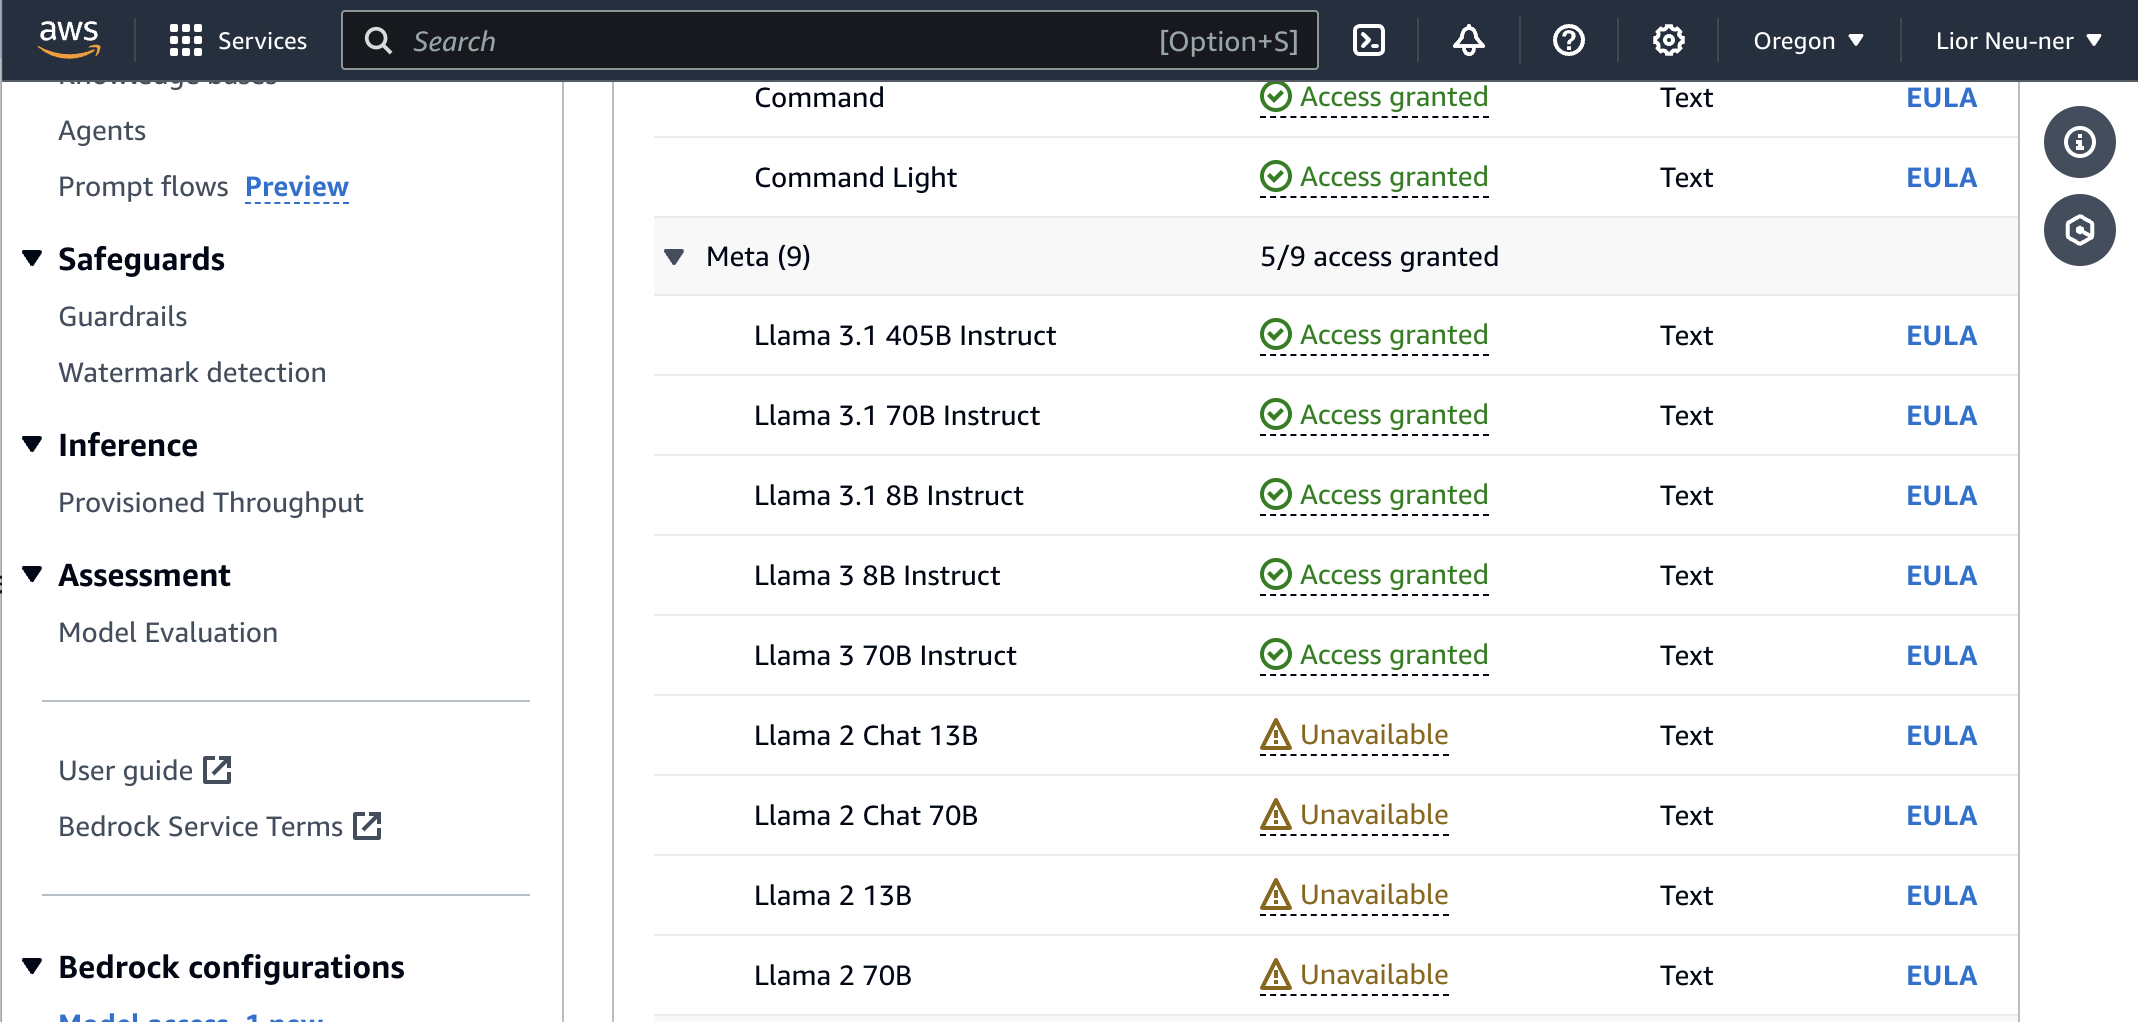
You'll also notice that we're using Meta's Llama 3 8B Instruct model. Make sure you have access to this model, or request access if you don't. You may need to change regions in AWS if it's not available. Alternatively, you can use a different Llama model.
Note: While this tutorial uses the Llama model, the concepts in this tutorial apply to all of Bedrock's supported models.
Lastly, the sample app already includes PostHog set up. You need to update the <ph_project_api_key> and <ph_client_api_host> placeholders with your PostHog API key and host (you can find these in your project settings).
There are two places to update. First, in src/app/api/generate-llm-output/route.js, where PostHog is configured for server-side event capture:
Second, in src/app/providers.js, where PostHog is configured for client-side event capture:
Run npm run dev and go to http://localhost:3000 to everything in action.
Compare prompts
With our app set up, we can begin capturing events with PostHog to evaluate and compare prompts. We cover three different ways to do this.
1. Quantitative metrics
Quantitative metrics involve measuring specific, quantifiable properties of the LLM outputs like:
- Token output count
- Latency
- Error rate
This is the quickest and simplest way to evaluate outputs, but doesn't provide a clear picture of the output quality.
How to capture quantitative metrics
We use posthog.capture() to capture bedrock_completion and bedrock_error events. In each of these events, we include properties for data we want to collect.
Update the code in src/app/api/generate-llm-output/route.js to capture a bedrock_completion event with properties related to the API request like so:
Then, to track errors, we capture bedrock_error events in the catch block of our code:
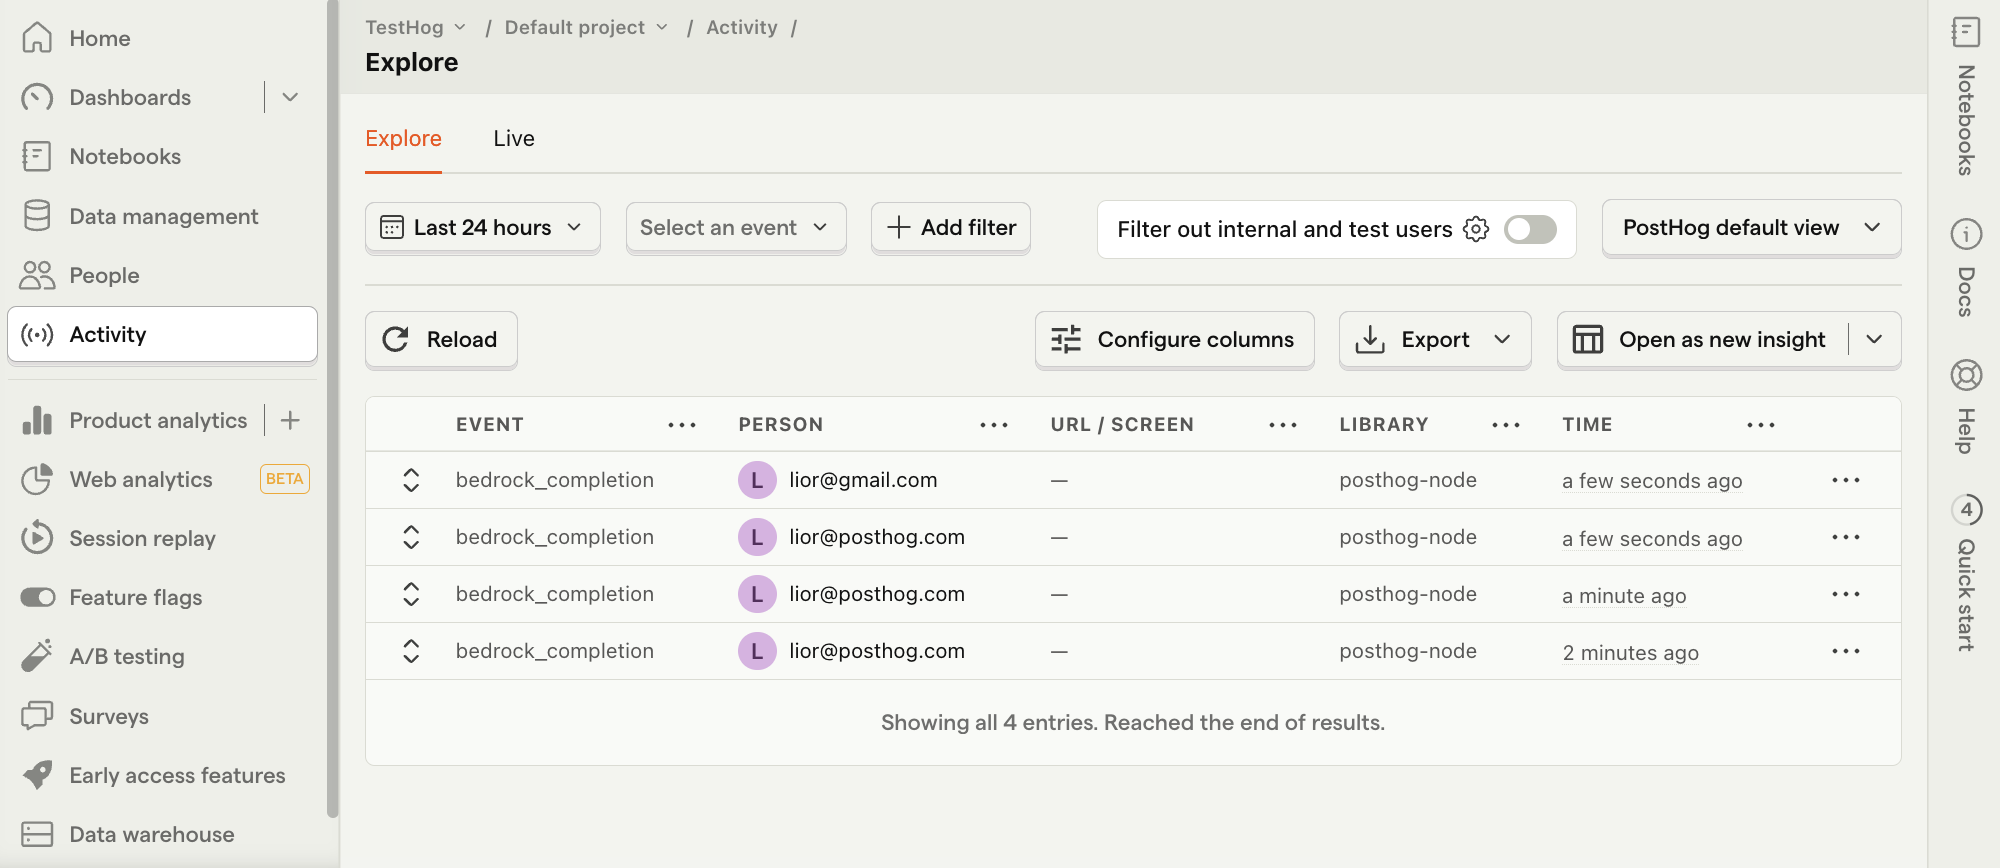
Refresh your app and submit a few prompts. You should then see your events captured in the PostHog activity tab.
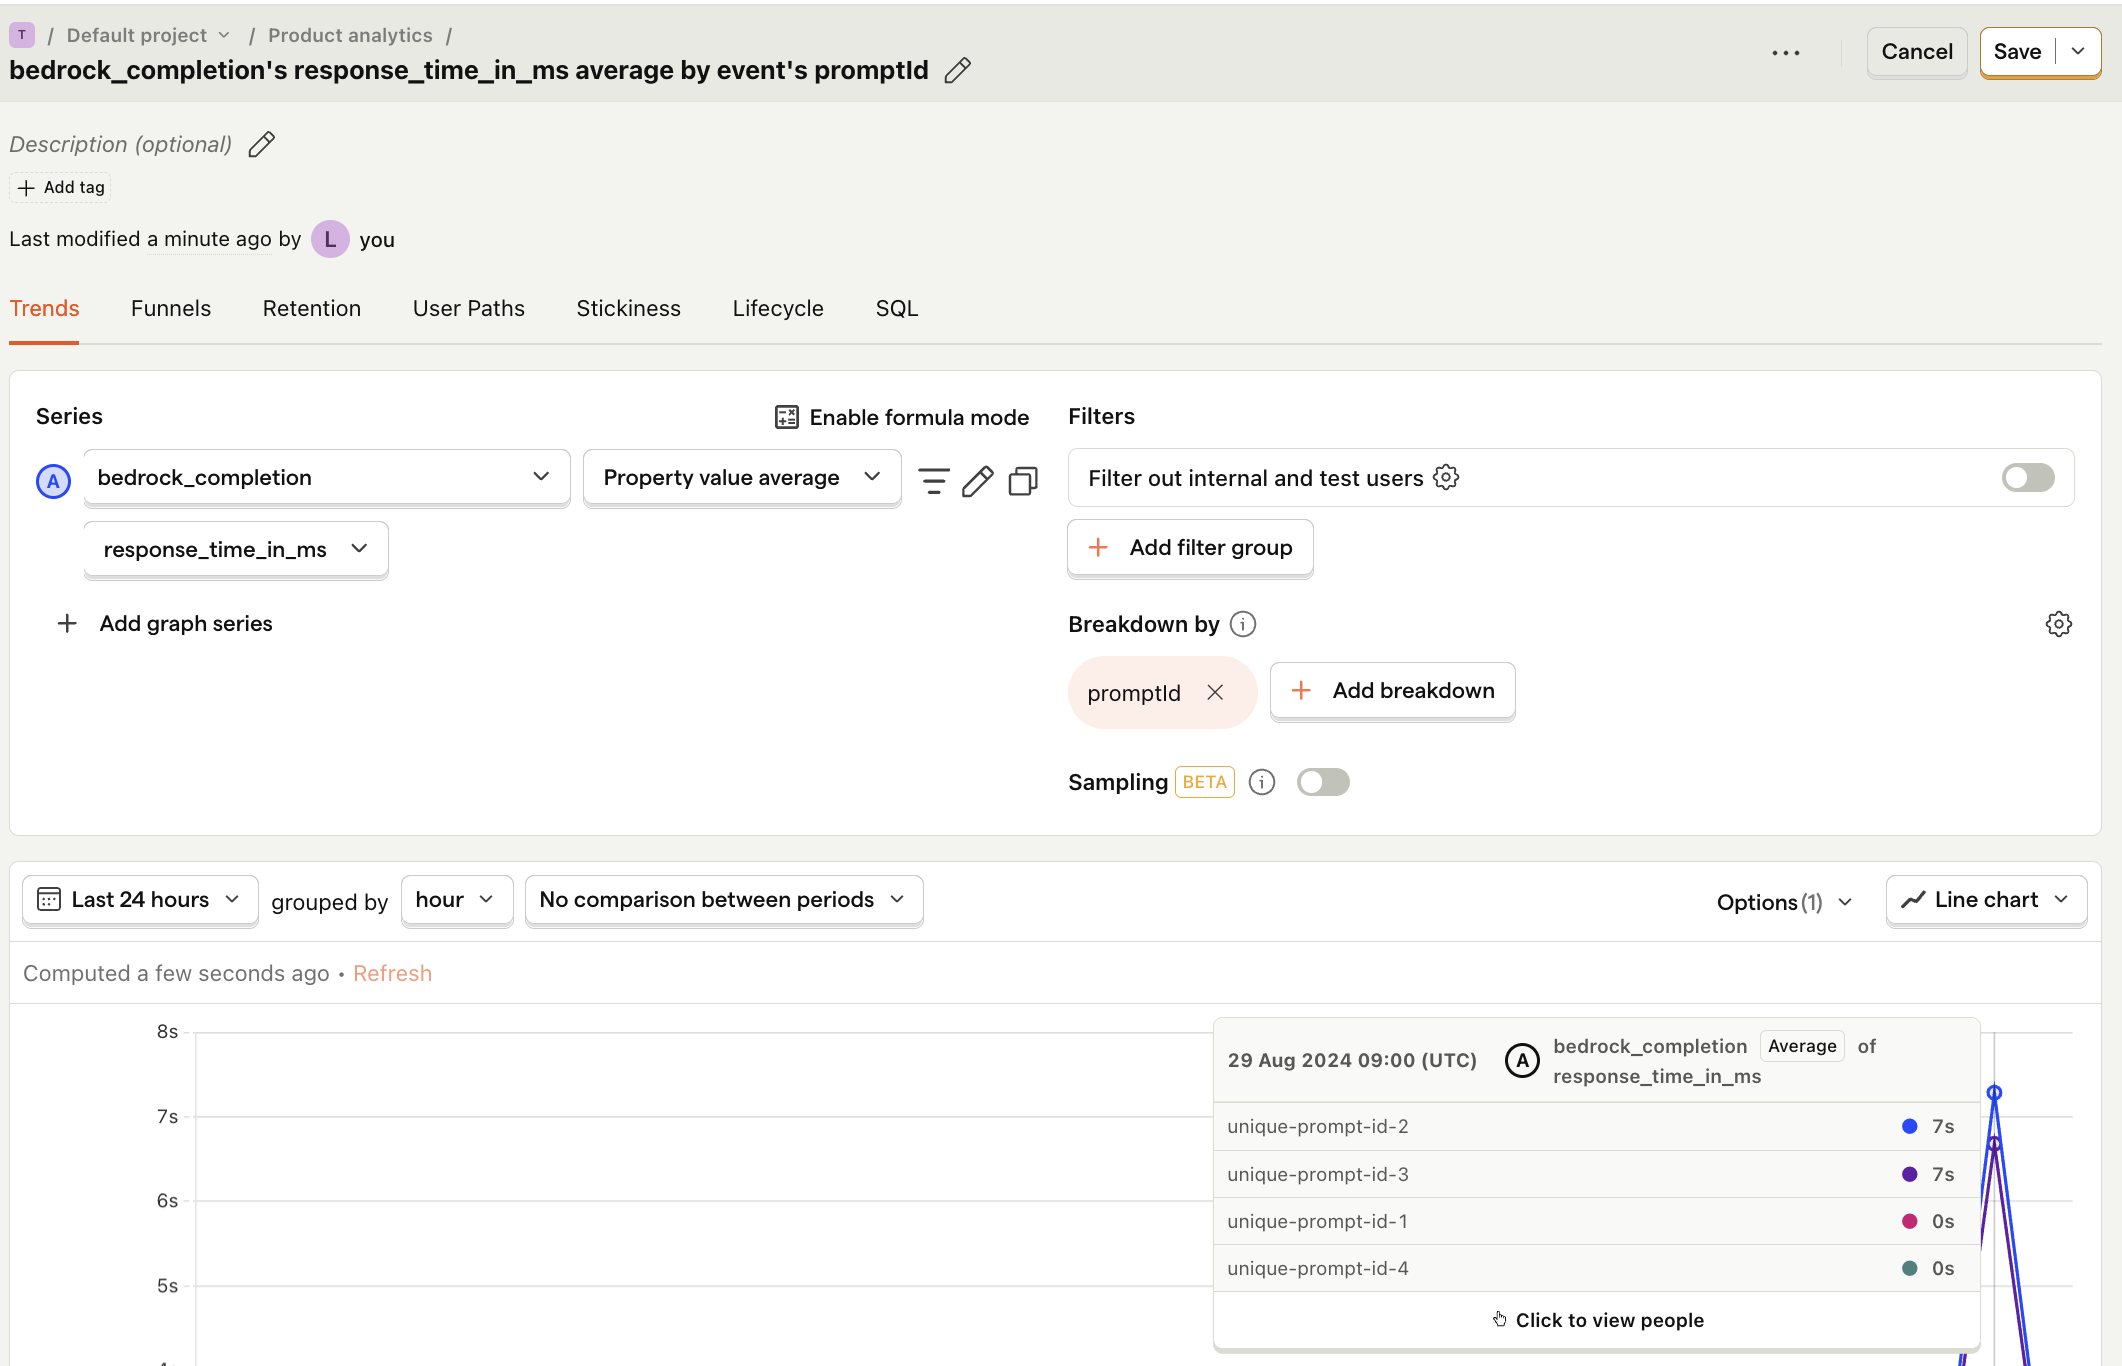
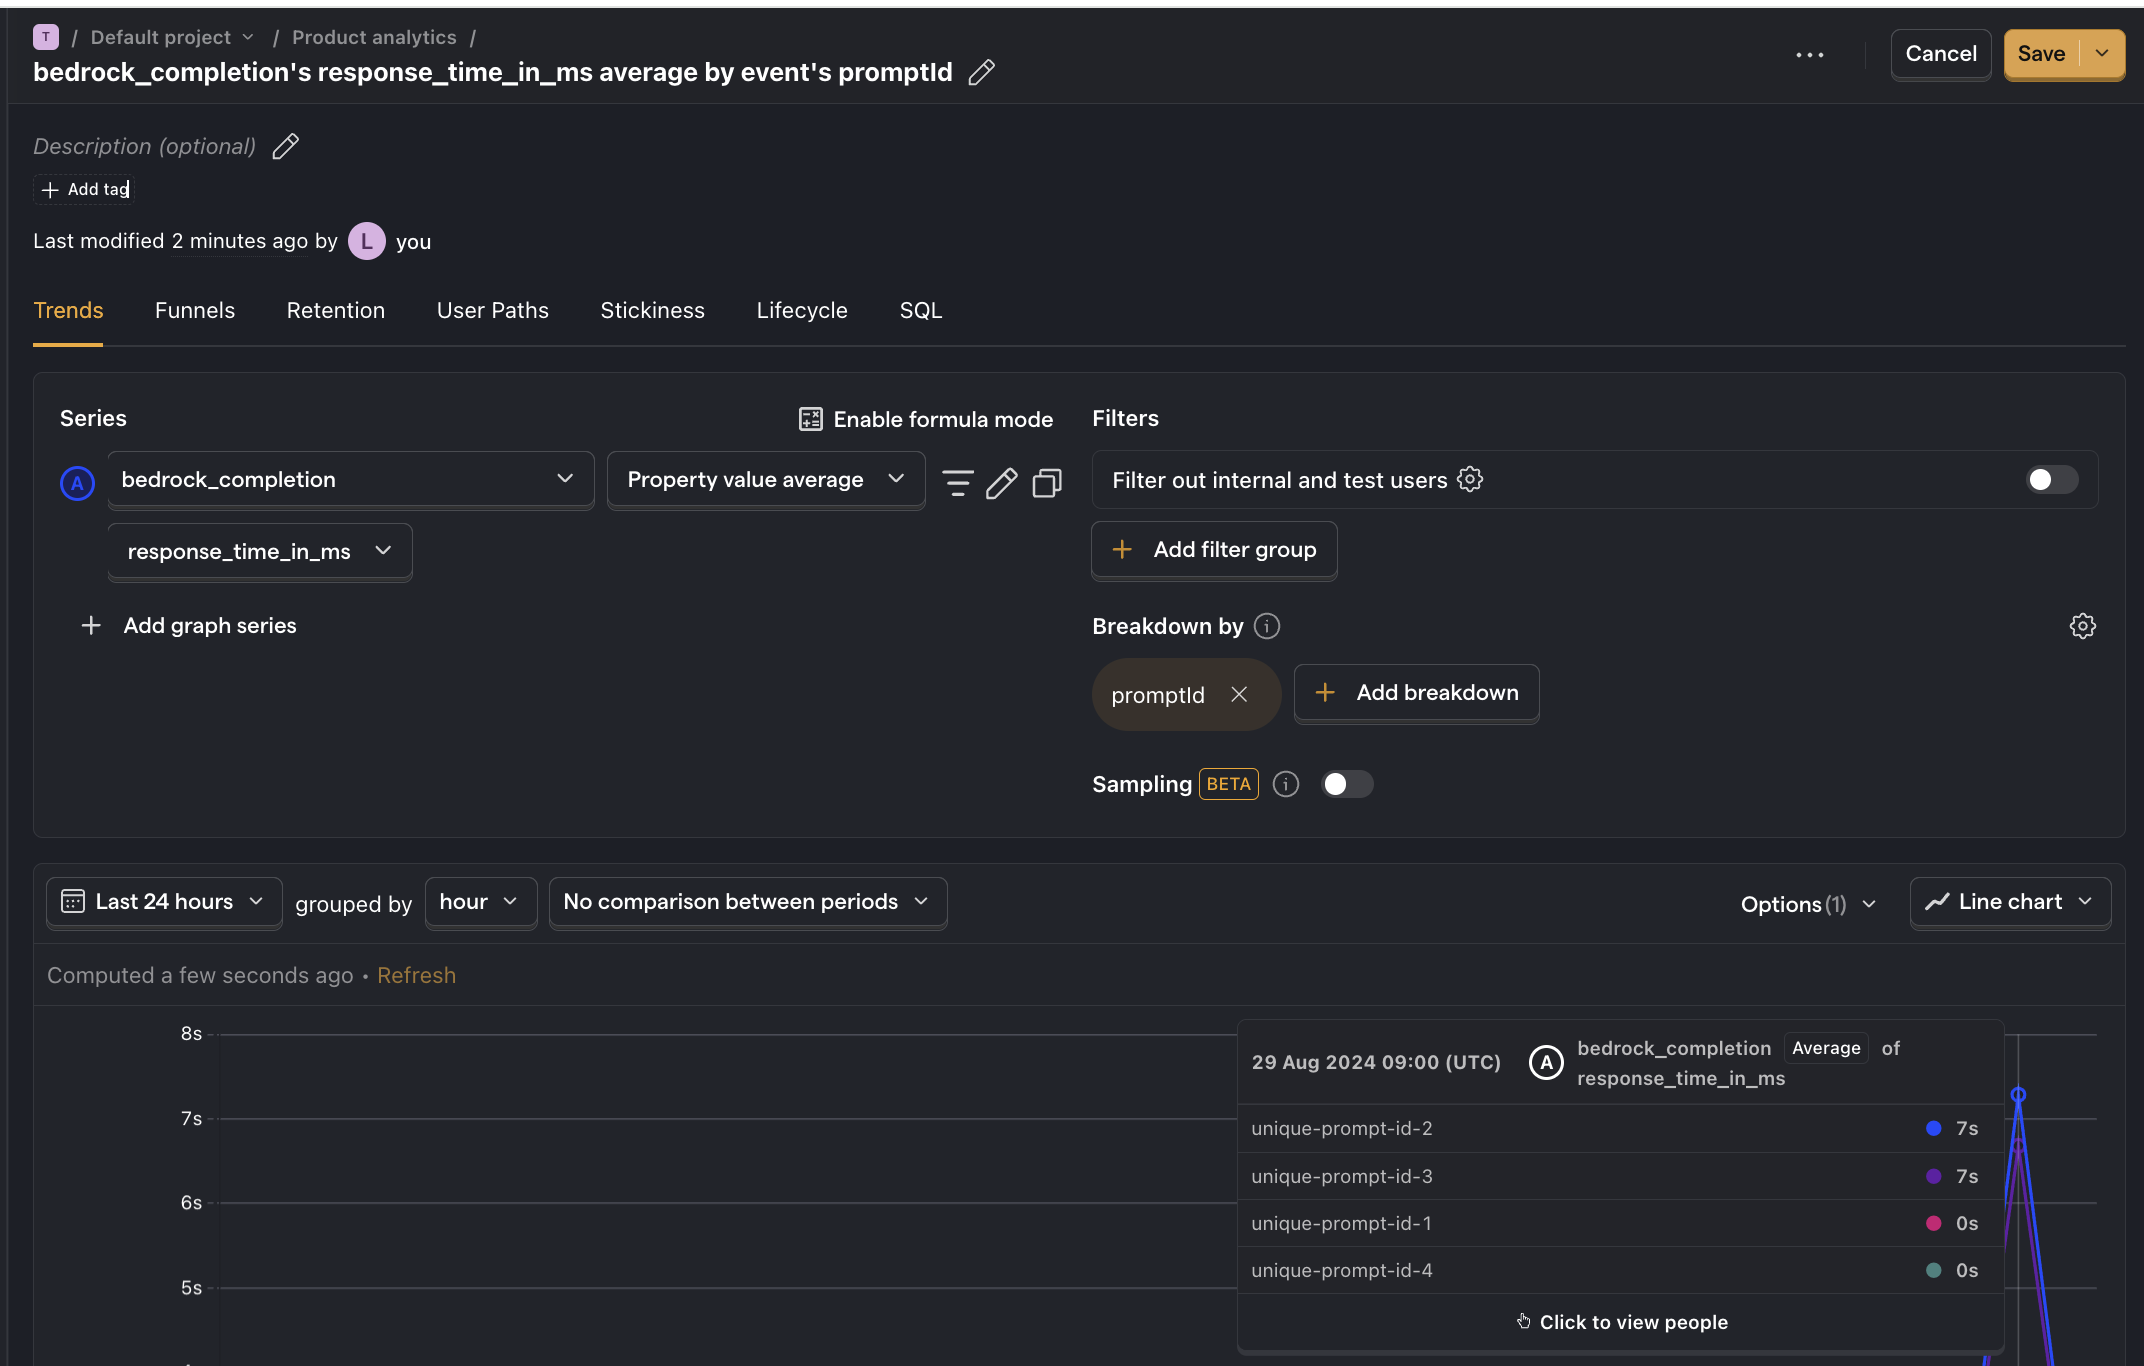
How to create insights
Now that we're capturing events, we can create insights in PostHog to visualize our data. Most importantly, we breakdown our data by promptId to compare them.
Below is an example of how to create an insight to compare average API response time for each prompt:
- Go to the Product analytics tab in PostHog and click + New insight.
- Set the event to
bedrock_completion - Click on Total count to show a dropdown. Click on Property value (average).
- Select the
response_time_in_msproperty. - For nice formatting, press Options and under
Y-axis unitselect Duration (ms) - Click + Add breakdown and select
promptId. - Save your insight.
User feedback
A good way to evaluate LLM outputs is to ask your users to rate them. In our sample app, we do this by asking if the response was helpful. Users can submit their response using the Yes and No buttons at the bottom of the page.
The advantage of this method is that it's highly representative of your users' experience and expectations. However, since you need to ask your users to rate responses, you're not able to evaluate your prompts before you ship them into production.
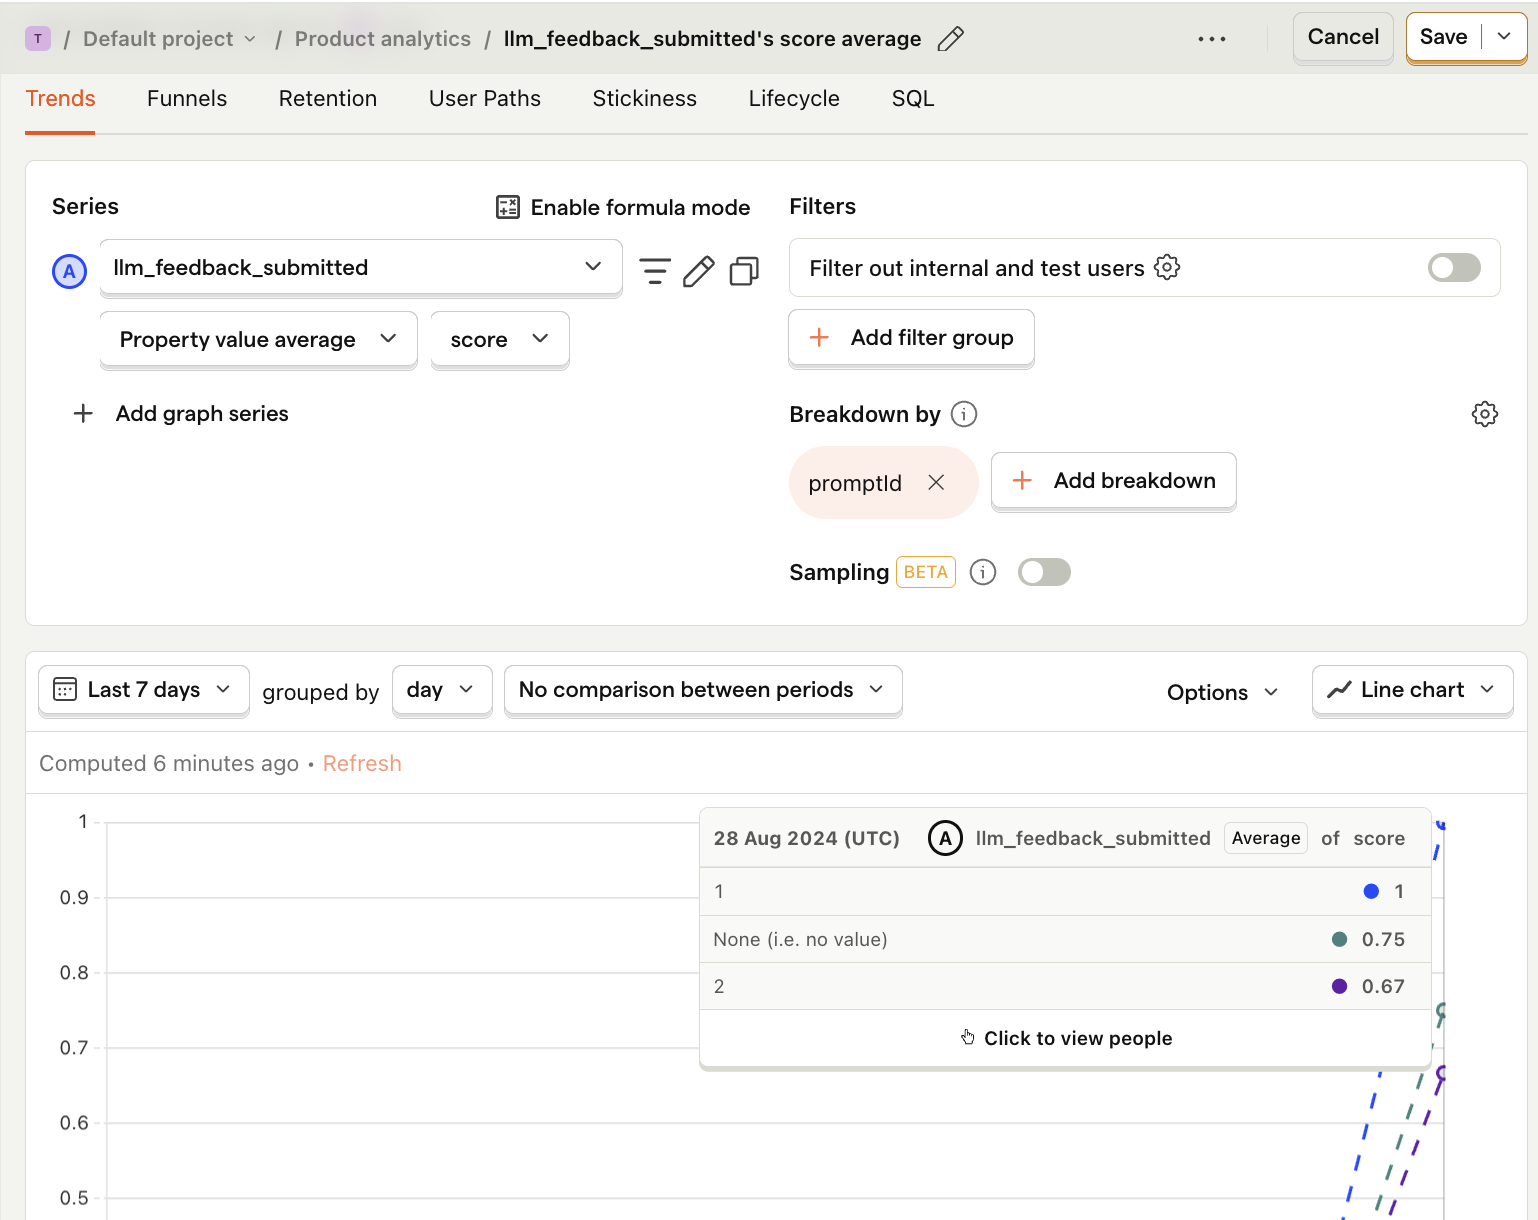
How to capture user evaluations
We capture an llm_feedback_submitted event with a score property (0 or 1). Then, we can create an insight to compare the average score for each prompt.
Add the following code to the handleFeedback function in src/app/page.js:
Refresh your app, submit a few prompts, and click on the Yes and No buttons to generate events in PostHog.
How to create insights
- Go to the Product analytics tab in PostHog and click + New insight.
- Set the event to
llm_feedback_submitted - Click on Total count to show a dropdown. Click on Property value (average).
- Select the
scoreproperty. - Click + Add breakdown and select
promptId. - Save your insight.
Model-based evaluation
Model-based evaluation, also known as "LLM-as-a-judge", is a powerful tool to assess large amounts of LLM outputs. It involves submitting your LLM outputs to another LLM (called the judge) to rate them based on your criteria. Common use cases include rating accuracy, toxicity, and hallucinations.
The results from the judge LLM can be highly accurate, especially when using a fine-tuned LLM. However, this approach is also the most time-consuming to set up.
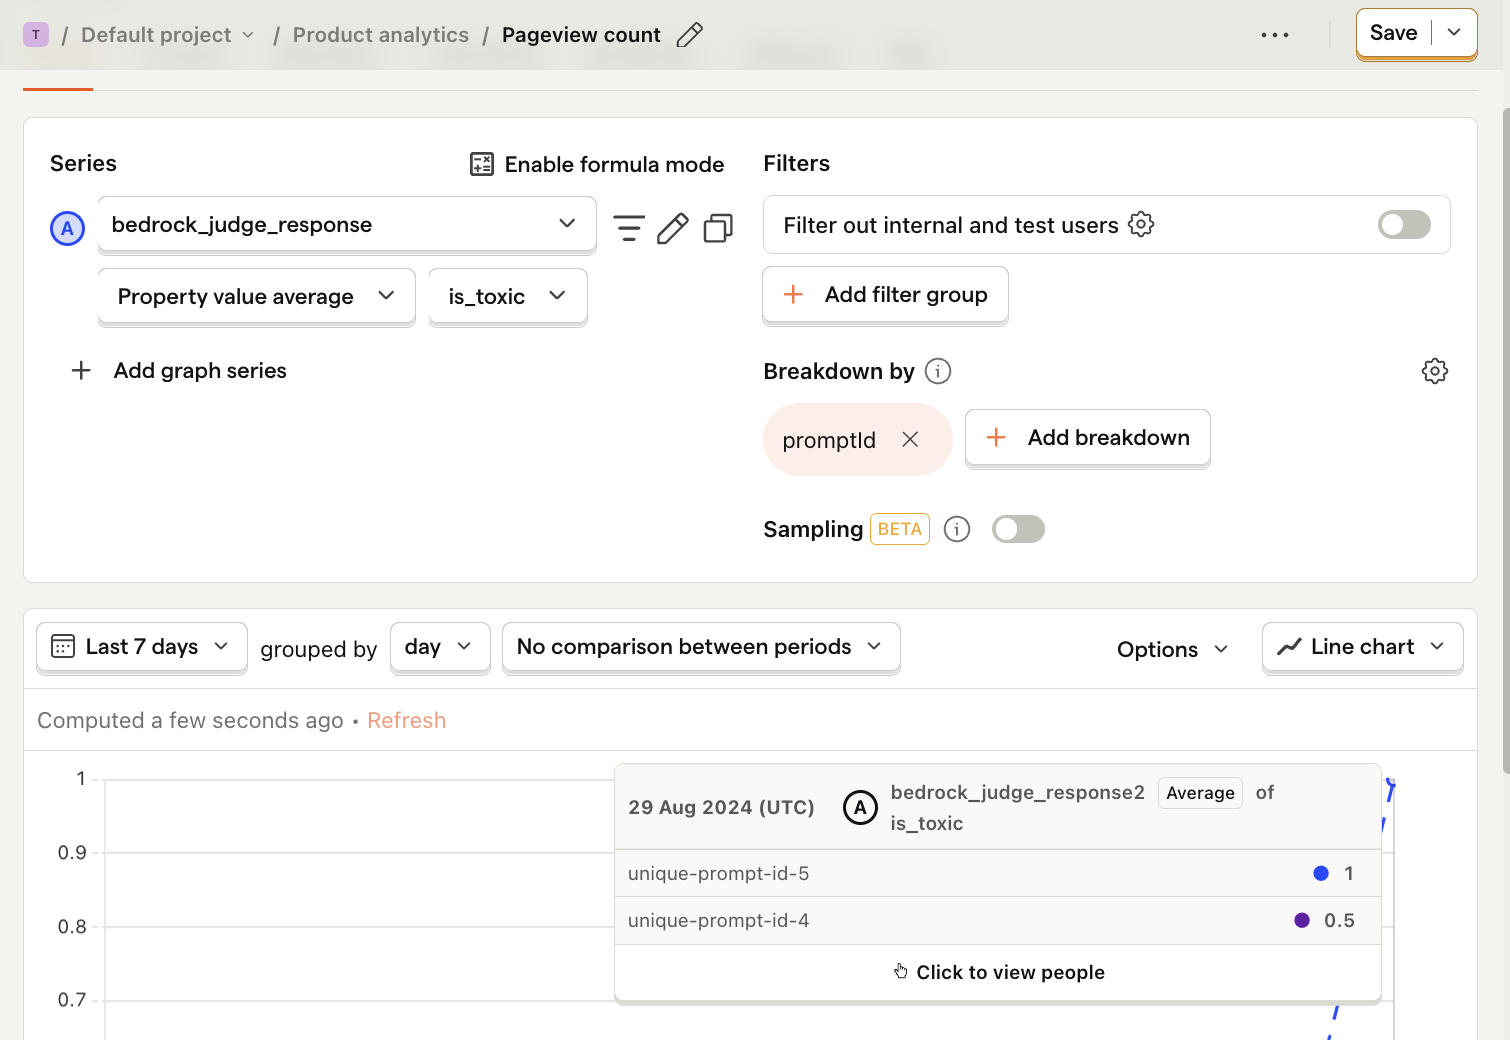
How to capture model-based evaluations
In our sample app, we implement a simple judge by submitting our LLM response to the same Llama 3 model. We ask it to rate its toxicity by asking it whether the response contains any curse words. Then, we capture its response with a bedrock_judge_response event.
Refresh your app and submit a few prompts (and try to get some toxic responses!).
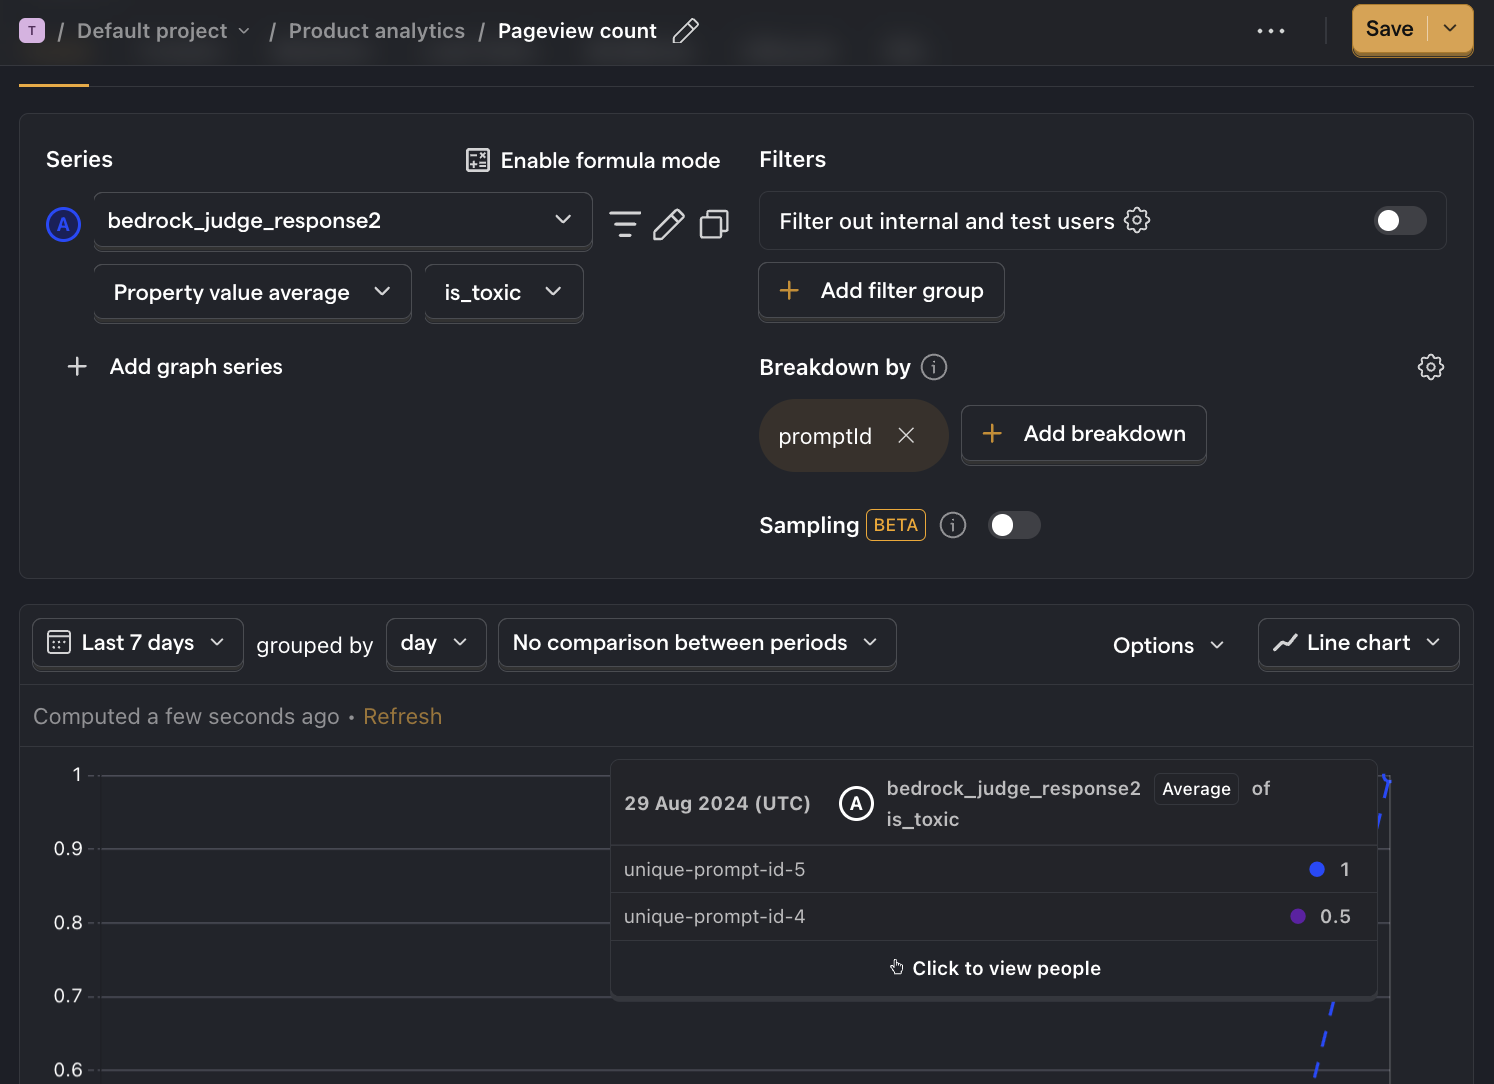
How to create insights
- Go to the Product analytics tab in PostHog and click + New insight.
- Set the event to
bedrock_judge_response - Click on Total count to show a dropdown. Click on Property value (average).
- Select the
is_toxicproperty. - Click + Add breakdown and select
promptId. - For nice formatting, press Options and under
Y-axis unitselect Percentage - Save your insight.
Further reading
- How to monitor generative AI calls to AWS Bedrock
- How to set up LLM analytics for ChatGPT
- Product metrics to track for LLM apps